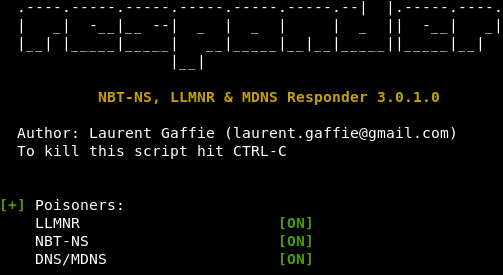
Responder is usually one of the first things a pentester will fire up after plugging into your network. It will respond to multicast traffic and will trick other endpoints on the same subnet into sending their username/hash. This is very hard to detect unless you’re running an IDS/IPS on your PC subnets. So, how do we block this?
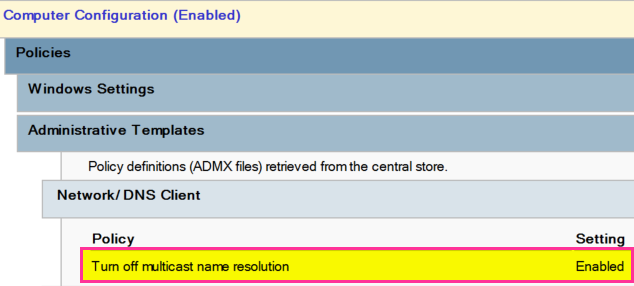
Step 1: Disable LLMNR (Local Link Multicast Name Resolution)
Step 2: Disable NetBIOS. This can be tricky to implement. The manual way is the easiest to do:
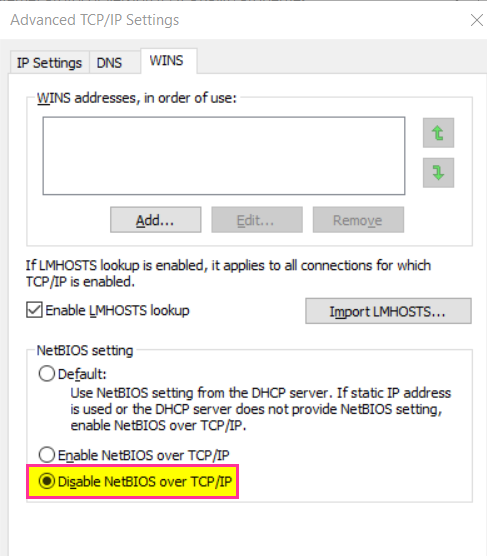
This will disable NetBIOS on all the interfaces on a machine. This may not be best as NetBIOS might be used in a home environment without a DNS server.
PowerShell
$regkey = “HKLM:SYSTEM\CurrentControlSet\services\NetBT\Parameters\Interfaces”
Get-ChildItem $regkey | foreach { Set-ItemProperty -Path “$regkey\$($_.pschildname)” -Name NetbiosOptions -Value 2 -Verbose}
This will disable NetBIOS on the interface plugged connected to the domain
PowerShell
Get-CimInstance -ClassName Win32_NetworkAdapterConfiguration | ? {($_.DNSDomain -eq ‘DNSDomain‘) -and ($_.IPAddress -like ‘IPAddr RegExp‘)} | Invoke-CimMethod -MethodName settcpipnetbios -Arguments @{TcpipNetbiosOptions = 2}
Step 3: Disable mDNS
REG ADD “HKEY_LOCAL_MACHINE\SYSTEM\CurrentControlSet\Services\Dnscache\Parameters” /v EnableMDNS /t REG_DWORD /d 0 /f
This can be placed under Computer Configuration -> Windows Settings -> Registry

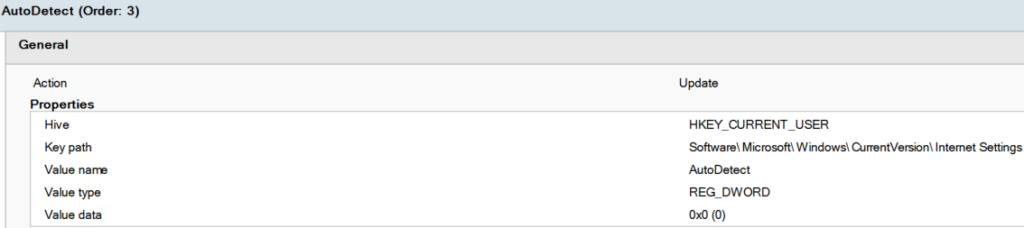
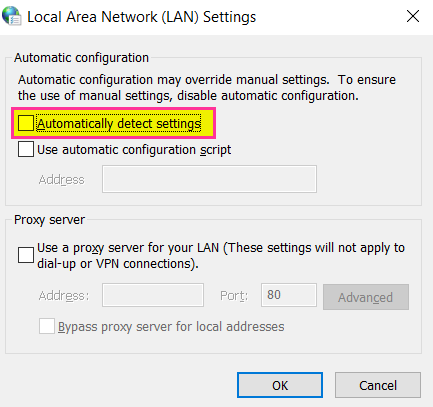
Step 4: Disable WPAD
[HKEY_CURRENT_USER\Software\Microsoft\Windows\CurrentVersion\Internet Settings]
“AutoDetect”=dword:00000000
This can be placed under User Configuration -> Preferences -> Windows Settings -> Registry
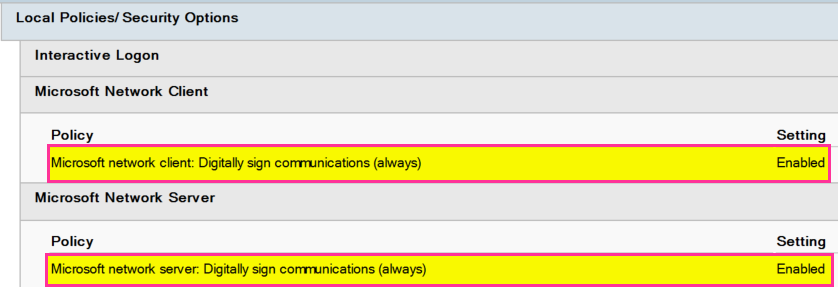
Step 5: Enable SMB Signing
This can be set under Computer Configuration -> Policies -> Windows Settings -> Security Settings. If a hash is captured this will prevent the attacker from relaying the hash to other machines. The next step for an attacker is to run the hashes through John/Hashcat and brute force them. So, it is best to have a good password policy in place.
Step 6: Have a strong password policy in place. The longer the password the harder it is to crack.